Saturday, January 2, 2016

Luling Skies Observatory, First Light

Friday Dec 18 provided clear skies and a wonderful opportunity for my first viewing in my new observatory.   The roof rolls off smoothly to offer a wide open view of the sky.  At 80" above the floor, the walls are higher than in most observatories, but in my light polluted backyard the walls provide a much needed light block from nearby streetlights.

Here is an inside view.  I haven't built any shelves yet so my gear is piled on the floor and a table.

Here is my Mallincam VRC-10 CF ready for a night of visual observing.   My daughter Heather came over and we had a great time until clouds rolled in a little after midnight.  The observatory worked out well and was a big improvement from setting up in the yard.


On Saturday night, December 19,  I slid my Mallincam XT-418 into the scope's focuser.  With this scope and no focuser rings installed, I've learned that I cannot achieve focus using the Mallincam 2" 0.75 focal reducer.  After some experimentation, I've found what works is placing a Baader Planetarium 2" Deluxe Clicklock Eyepiece Extension in the focuser, then the Mallincam 2" 0.75 focal reducer followed by a Baader Planetarium 2" / 1.25" Clicklock Reducer, and then the camera with a Lumicon Deep Sky Filter threaded onto the nose piece.


After getting the equipment running, I had some difficulty with a newly updated version of the Miloslick Mallincam control software.  I finally got it figured out and went to the Orion nebula as my first object.   I've gotten better pics previously, but this is the best I could manage on this night.  Given the size of the object I needed further focal reduction, but with clouds threatening I didn't take the time to change my setup.

 I viewed the flame and horsehead nebulas and the Pleadies before clouds rolled in and ended my observing session.  It was a pleasure to simply shut down the electricity, close the roof, and head inside.  Much better than spending the next hour tearing down the equipment and stowing it away.   I look forward to many more observing sessions in my backyard observatory.


Friday, January 1, 2016

Luling Skies Observatory Construction, Day 2

After heavy rains on Wednesday, the skies cleared and the crew got an early start to complete the observatory on Thursday Dec 17.   First task at hand were the 4" x 4" supports for the roof rails.  The posts sit on 10" diameter concrete footers.


Next came the 4" x 4" rails.  

 The rails and supports are constructed of pressure treated lumber.

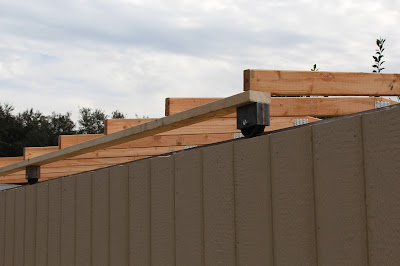
The roof was assembled from trusses on 24" centers with a 2" x 4" side rails.  The roof profile is a shallow 1 x 12 pitch so that the roof blocks as little of the sky as possible.  The use of such a shallow roof pitch is possible as we have no concern with snow accumulation in my Southeastern Louisiana location.

Here the first of the v-groove rollers is added.  The v-groove wheels and track were obtained from Gate Depot.  For the 8' x 16' metal roof we used 3  wheels on each side.  The 4" diameter v-groove wheels have double bearings and roll very smoothly.   The wheels ride in a metal box .


Here is the heavy duty track that the v-groove wheels ride on.  Note that because of the width of the "ears" on the track, a 2 x 4 had to be screwed to the inside of the roof header and the roll off rails.

With the floor nearly 12" above the ground and 80" high walls, these guys were really stretching to hoist the roof frame into place.   

With the help of a third worker on a ladder, they set the wheels on the track.


Attaching the roof decking and then will come the metal sheeting.

Fascia added to the sides of the roof to cover the wheels. 


As night fell, they crew kept working to complete the job.

The roof rolls easily when pushed by hand, but using a 4' long 2" x 4" "pusher" makes the job easier.


At the end of the second day, the observatory was complete except for door sills and stops on the roof rails.   The important thing for now is I have a functional observatory !  In the days to come I need to install fittings to secure the roof, shelving, complete the electrical wiring, add lighting, etc, etc, etc..